If you’ve ever walked past a multi-story apartment building, a school campus expansion, or a commercial warehouse going up, you might’ve noticed something unusual: entire sections of walls being craned into place like giant, precision-cut puzzles. That’s precast wall panels at work—and if you’ve ever wondered how we, as a precast wall panels supplier, turn those factory-made slabs into the backbone of a structure, let me pull back the curtain on our process. For the past 12 years, I’ve worked side-by-side with our installation teams to refine every step, and it’s not just about lifting heavy pieces. It’s about accuracy, safety, and ensuring a panel that’s cured for 28 days in our facility fits perfectly into a job site that’s been prepped to the tenth of an inch. Precast Wall Panels
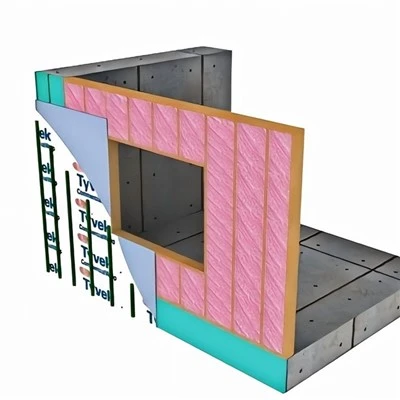
Let’s start at the point where our work meets the job site: pre-installation planning. This isn’t a step that gets done on the fly, trust me. Before our first truck backs into a construction zone, our project managers sit down with general contractors, structural engineers, and even the on-site foremen to walk through a dozen critical details. First, we pull structural blueprints and verify the exact load each panel will bear. Precast panels aren’t one-size-fits-all—some are load-bearing, holding up floors and roof decks, while others are non-load-bearing curtain walls that keep out wind and weather. A 12-foot tall load-bearing panel can weigh as much as 15,000 pounds, so missing a load calculation means a crane that’s not rated for the job, or worse, a panel that’ll strain the building’s foundation for decades.
Next, we work through site logistics. Job sites are messy: there might be active digging for underground utilities, stacked lumber, or portable toilets scattered around. We need a clear path for our delivery trucks—each of our standard precast panel trucks is 53 feet long, so a narrow access road or low-hanging power lines can derail a whole day’s schedule. We also coordinate with the crane’s schedule, since crane time is one of the most expensive line items on a construction budget. We’ll lay out a “panel staging plan” on-site too: large, flat, compacted areas where panels can be stored, organized by the order they’ll be installed. Storing panels at a slight tilt (we use custom metal stands that cradle the bottom of each panel) prevents them from warping or cracking in the sun or rain, which is a common mistake new job sites make.
The night before delivery, our team pulls the panels that are needed first, loads them onto the truck in reverse order of installation, and does a final quality check. We run a laser level over each panel’s edges, check for any micro-cracks that might’ve developed in transit, and confirm that the embedded hardware—steel inserts that connect the panel to the foundation, floor, or adjacent panels—are tight and correctly positioned. That hardware is non-negotiable: when we fabricate a panel in our plant, we place those steel inserts during the casting process, so they’re aligned exactly where the engineer specified. Mess up the placement in the plant, and you end up with a panel that can’t connect to the rest of the structure.
Once the truck is on-site and the crane is ready, we move to the pre-installation prep the job team handles before our panels go up. The foundation or floor where the first panel will sit has to be perfectly level. We bring a professional laser level to verify every point along the base—even a 1/8-inch gap in a load-bearing panel can lead to uneven weight distribution and long-term structural issues. The team also installs temporary anchor bolts along the base of the wall, spaced every 4 feet, that line up with the inserts at the bottom of our precast panels. We apply a thin bead of non-shrink grout (a special cement mix that doesn’t shrink as it cures) to the base of the wall before setting it down. That grout acts as a shim and a sealant, filling small gaps and ensuring the panel sits flat and evenly.
Now, the moment everyone waits for: lifting the panel. Our installation crew is trained to rig each panel safely, and we never cut corners here. We use four-point lifting systems for panels over 10 feet tall, instead of two points, to prevent the panel from twisting or bending mid-lift. Before the crane operator lifts, a ground crew member double-checks that all slings are properly fastened, that the lifting points on the panel aren’t damaged, and that the path the panel will take is clear of workers, power lines, or construction debris. Once the panel is 2 to 3 feet off the ground, we pause to test its balance—if it tilts too far to one side, we adjust the slings before lifting it higher. That 15,000-pound panel might look rigid, but it’s brittle compared to steel, and a sudden jolt can cause a crack that would ruin it and create a safety hazard.
Setting the panel into its position is where the precision really kicks in. The crane operator moves the panel slowly, guided by two members of our ground crew, who use signal sticks and two-way radios to direct every movement. We position the panel so its bottom inserts line up with the anchor bolts on the base, and then lower it until it’s about 6 inches above the floor. Then we use a combination of a tape measure, a manual level, and a laser plumb line to adjust the panel side-to-side, forward and back, until it’s perfectly aligned. For non-load-bearing curtain walls, we might use metal shims to adjust small gaps; for load-bearing panels, we use precision shims that match the exact specification from the engineer, right down to 1/32 of an inch. This step usually takes 10 to 15 minutes per panel, even for a simple unit, because rushing here means problems later.
Once the panel is in position, we secure it temporarily while we connect it to adjacent panels. Each precast panel has connection points along its side edges, usually steel plates or protruding rebar, that are designed to join with the next panel in the wall. We apply a bead of structural sealant along the edge of the panel that will meet its neighbor, to create a weather-tight bond that also strengthens the wall’s structure. Then we align the adjacent panel, just like we did with the base, and fasten the two panels together with high-strength bolts or welds, depending on the project requirements. For multi-story buildings, we also add temporary metal braces to hold the panel in place until the entire wall is connected, because wind can catch a single panel and shift it before all connections are made. Those braces are removed only after the wall is fully secured and inspected.
After all panels for a wall section are installed and secured, we move on to the final connections and quality checks. For load-bearing walls, we grout all vertical joints between panels—we pump liquid concrete grout into the gaps between panels to fill them completely, creating a solid, continuous wall that acts as a single unit rather than separate slabs. For curtain walls, we apply a weatherproof sealant to all joints, then smooth it out to create an even, water-resistant surface. We also run a comprehensive quality check: we use a laser level to confirm the entire wall is plumb (within 1/4 inch per 10 feet, per industry standards), check all bolts and welds to make sure they’re tight, and inspect all joints for any gaps or imperfections.
Then we get one more check that’s non-negotiable: a third-party inspection. Most construction projects require independent engineers to verify that all precast components were installed correctly, because the safety of the building depends on it. Once that inspection is signed off, the temporary braces come off, and the wall is ready for the next phase of construction—whether that’s flooring, roofing, or interior finishes.
As a precast wall panels supplier, what I love most about this process is how it balances factory precision with on-site adaptability. Every panel we make is engineered to exact standards, but installing it still requires a team that pays attention to the small details: the level of a floor, the angle of a sling, the thickness of a grout bead. We’ve seen projects get delayed because a delivery truck arrived at the wrong time, or a panel was stored at the wrong angle and developed a crack. That’s why we don’t just sell panels—we work with our clients from the planning stage all the way through final inspection, to make sure every step goes smoothly.
If you’re planning a construction project that uses precast walls, whether it’s a small commercial building or a multi-story residential complex, we can help you navigate every part of the process. Our team of experienced project managers and installation specialists will work with you to create a tailored plan, deliver high-quality precast panels on time, and ensure your installation goes safely and efficiently. Reach out to our team to discuss your project needs, get a custom quote, and learn more about how precast walls can save you time and money on your next build.
Engineered Wood Beams References
Precast/Prestressed Concrete Institute. (2021). Precast Concrete Wall Panel Installation Guide. PCI Standards & Practice Manual.
American National Standards Institute. (2019). Standard for Load Bearing Precast Concrete Walls. ANSI/PCI NDC-21.
Occupational Safety and Health Administration. (2022). Crane Safety for Construction Work. OSHA 3153-10.
Zendekin Low-Carbon Technology Co., Ltd.
We are one of the most professional precast wall panels manufacturers and suppliers in China. With abundant experience, we warmly welcome you to wholesale customized precast wall panels from our factory. If you have any enquiry about quotation, please feel free to email us.
Address: Building 3, Yincheng INC Center, No.59 Tianyuan West Road, Jiangning District, Nanjing, Jiangsu, China.
E-mail: 13813916590@126.com
WebSite: https://www.zdqeco.com/
