Alright, let’s cut to the chase – if you’re reading this, odds are you’ve fought a loose hose clamp at least once. Maybe it was the radiator hose on your car that left you stranded on the side of the highway, or a garden hose in your backyard that kept spraying water all over your shoes mid-watering. I’m not just some random blogger yapping about hose clamps, either – I’ve worked in the hose clamp game for the last 8 years, so I’ve tightened (and over-tightened, and under-tightened) more of these little metal wonders than I can count. Today, I’m breaking down how to do it right, no wasted effort, no broken hoses, no leaks. Hose Clamp

First off, let’s get one thing straight: a hose clamp isn’t just a “clip that holds things tight.” There’s a science to it, and messing up that science is where 90% of the problems start. I’ve seen DIYers use pliers to crimp a worm drive clamp so hard they snapped the band right in half. I’ve also seen folks just twist a screw until it feels “snug” and walk away, only to find a puddle under their car a week later. So let’s start with the basics: what are we actually tightening? Most common hose clamps fall into two camps – worm drive (the ones with the slotted screw in the middle, like the ones you grab at any auto parts store) and T-bolt clamps (the heavy-duty ones with a solid band and a T-shaped bolt for tighting, usually used for high-pressure stuff like truck intercoolers). I’ll cover both, since those are the two that 99% of people will ever need.
Let’s start with the most popular one: the worm drive hose clamp. I know, I know – it looks simple, right? A band, a screw, a little housing. But here’s the thing: the screw moves a worm gear that pulls the band tight, so how you turn that screw matters a lot. First, you need the right tool. I can’t stress this enough – don’t use a random pair of pliers or a flathead screwdriver that’s too small. Grab a screwdriver that fits the slot perfectly, or a socket wrench if it’s a larger clamp. Using the wrong tool is how you strip the screw head, and that’s a nightmare – you’ll be digging a damaged screw out of the clamp when you could have just used the right tool in the first place.
Before you even touch the clamp, prep the connection. That’s step zero, people. If your hose is covered in dirt, oil, or grime, wipe it down first. If the metal barbs on the fitting (the thing the hose slides onto) are rusty, scrub them a little with steel wool. If you skip this, the clamp isn’t going to seat properly – it’ll be sitting on gunk, so even if you tighten it as hard as you can, it’ll slide. I’ve had customers send back clamps because they “leaked” only to find they didn’t prep the fitting. Don’t be that guy.
Now, slide the clamp onto the hose, push the hose all the way onto the fitting, then slide the clamp so it’s centered over the barbs – not sitting on the straight part of the fitting, not hanging off the end. That’s another mistake I see all the time. People just slap the clamp anywhere on the hose and tighten it, but if it’s not over the barbs, it can’t grab the hose properly. Got that? Centered over the barbs. Good.
Now, for the tightening part with a worm drive clamp. Turn the screw clockwise – easy, right? But how much? Let’s do this in increments. Turn the screw about a quarter turn, then check. If it feels too loose, another quarter turn. Stop when you’ve gone about 3/4 of a turn max. Wait, that’s it? No, cranking it as hard as you can? Nope. Here’s why: over-tightening a worm drive clamp can damage the hose. Most rubber hoses (especially EPDM, which is the standard for auto and plumbing) have a thickness, and if you squeeze them too hard, they’ll deform – kind of like squeezing a soda can so hard it dents, except here it’s a hose that’s supposed to seal. When the hose deforms, the clamp isn’t sitting on the round, intact part of the hose anymore – it’s sitting on a flattened spot, so as the hose heats up and cools down (like a radiator hose going from cold to operating temperature), the metal band will dig into the hose, eventually causing a pinhole leak. I’ve seen this so many times it’s not even funny.
Also, if you over-tighten a worm drive clamp, you risk stripping the worm gear inside the housing. One customer last year tightened a clamp on a boat’s exhaust hose so hard the worm gear stripped, and when they took the boat out on the lake, the hose blew off. Cost them thousands in engine damage. So no, don’t crank it. A quarter turn at a time, until you get that “stop point” where it feels snug, and don’t go past that.
Now, what about T-bolt clamps? These are the heavyweights, used for high-pressure applications – intercoolers, exhaust systems, industrial hoses. These are way less forgiving than worm drive clamps, so doing this wrong is even worse. First, same prep step: clean the hose and fitting, center the clamp over the barbs. T-bolt clamps have a solid band, a T-shaped bolt, and two nuts on either end of the T. Wait, no – actually, most are single nut on the T end, right? Either way, the idea is to tighten the bolt evenly. Here’s how to do it: use a socket or a wrench on the nut, and turn it a little bit, then switch to the other side of the clamp and tighten the opposite nut a little, back and forth, until it’s snug. Don’t just crank one nut as hard as you can – that will warp the band, so it won’t seat evenly around the hose. Think of it like tightening lug nuts on a car – you do it in a crisscross pattern to get even pressure. Same exact thing here.
With T-bolts, you can tighten them a little more than worm drive, but only a little. You still don’t want to squeeze the hose so hard it deforms. For most standard T-bolt clamps, a torque wrench setting of 15 to 20 foot-pounds is perfect – that’s enough to create a good seal without damaging anything. If you don’t have a torque wrench, just tighten until the band is snug, the T-bolt doesn’t wiggle, and you can’t pinch the hose with your fingernails under the band. If you can pinch it, it’s too loose. If it’s impossible to pinch at all, you overdid it.
Wait, what about different materials? That’s another thing I get asked all the time. If you’re using a silicone hose – those thick, heat-resistant ones used for turbo systems – you can tighten a little more, because silicone is sturdier than standard rubber. But even then, don’t go crazy. Stainless steel clamps are better for high temps, obviously, and they don’t corrode as fast, so if you’re working under the hood of a car that gets hot, or in a marine environment, spring for stainless steel. That’s a pro tip: don’t use zinc-plated clamps for anything that’s exposed to salt water or high heat – they’ll rust through in a year, and then you’re back to square one.
Now, let’s talk about common mistakes that people make, because these are the ones that cause the most headaches. First, using the wrong clamp size. This is huge. If your hose is 2 inches in diameter, don’t buy a clamp that’s advertised as “1-7/8 to 2-1/4 inches” and think it’ll work. It might be a little loose, or it might be too big and slide around. You need a clamp that matches the hose’s outer diameter, or slightly smaller, so when you tighten it, it grabs. I’ve had people come to me saying their clamps keep slipping, and 9 times out of 10, they just bought the wrong size. Check the OD of your hose, then match it to the clamp’s range. Easy.
Another mistake: reusing clamps. I know, I know – it’s tempting to take that clamp off an old hose and use it on a new one, but most clamps aren’t designed to be reused, especially worm drive ones. The worm gear wears out a little when you tighten it the first time, so it won’t pull as tight the second time. T-bolt clamps are a little better for reuse, but even then, if you’ve already tightened them once, they might not get the same seal. Just buy a new one. They’re cheap, and it’s not worth the risk of a leak.
Wait, what about when a clamp is already too loose? Like, if it’s slipping down the hose, or the hose is moving? First, check if you used the right size. If the clamp is too small, that’s a problem. If it’s the right size, you might have over-tightened it before, which caused the worm gear to strip, so it can’t pull anymore. In that case, just replace it. Don’t try to crank the screw harder – that’ll just break the clamp.
Let me share a quick story that drives this all home. A few months back, a local auto shop brought in a truck because the radiator hose was leaking. The mechanic had used a random worm drive clamp, tightened it as hard as he could with pliers, and when the hose heated up, it deformed, and the metal band cut right through the rubber. By the time they noticed, the truck had overheated, blowing the head gasket. The clamp he used was the wrong size, he over-tightened it, and skipped prepping the fitting – all the mistakes we talked about today. Total cost for the customer? Like $2,500. For a $2 clamp. That’s how important this stuff is.
Now, let’s wrap this up with a quick, step-by-step cheat sheet, so you don’t have to come back and read this whole post next time you need to tighten a clamp. For worm drive clamps: 1) Prep the hose and fitting, wipe clean, scrub barbs if needed. 2) Check clamp size, get the right one. 3) Slide clamp onto hose, center over barbs on fitting. 4) Use the right tool (correct screwdriver or socket) – no pliers. 5) Tighten in quarter-turn increments, stop when snug, don’t overdo it. 6) Give it a gentle tug to make sure it’s not slipping. For T-bolt clamps: 1) Same prep and size check. 2) Slide clamp, center over barbs. 3) Tighten nuts in alternating increments (crisscross, like lug nuts) to get even pressure. 4) Stop when snug, hose doesn’t deform. 5) Torque to 15-20 ft-lbs if you have a wrench.
Look, I know this sounds like basic stuff, but you’d be shocked how many people skip these steps, and end up with a mess. If you’re working on a big project, or just need reliable clamps for regular use, hit us up for procurement talks. We’ve got every type of clamp for every application – auto, plumbing, industrial, marine – and we can help you pick the right size and type for your job, so you don’t waste money on the wrong stuff. No B.S., no hidden fees, just solid clamps that do what they’re supposed to do.
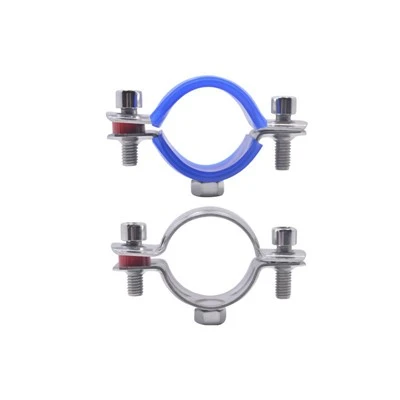
At the end of the day, tightening a hose clamp isn’t rocket science, but it’s also not just cranking as hard as you can. A little care, the right tool, and following these simple steps will save you from so many headaches later. Next time you’re working on a hose, remember what we talked about – no over-tightening, prep first, get the right size. You’ll be glad you did.
Hose Clamp References:
- Society of Automotive Engineers. (2019). Performance Requirements for Worm Drive Hose Clamps. SAE International.
- American Society of Mechanical Engineers. (2021). Standard Practice for Hose Clamp Installation and Torque Specification. ASME B107.4-2021.
- Marine Industry Manufacturers Association. (2020). Guidelines for Hose Clamp Selection in Marine Applications. MIMA Technical Bulletin 12.
Dongtai Chuanqianzhou Stainless Steel Products Co., Ltd.
As one of the most professional hose clamp manufacturers and suppliers in China, we also support customized service. Welcome to buy durable hose clamp made in China here and get pricelist from our factory. For price consultation, contact us.
Address: No. 168 Huinan Throat Hoop, North of Fengshou River Bridge, Shiyan Town, Dongtai City, Yancheng City, Jiangsu Province
E-mail: gu19910218@163.com
WebSite: https://www.hnanclamp.com/
